In this Look Book tutorial post, I share with you the steps to creating a background for ATCs or Artist Trading Cards. I love making backgrounds to use in mixed media projects they are so fun and easy to create. Let’s start with the supplies I used to create the background.

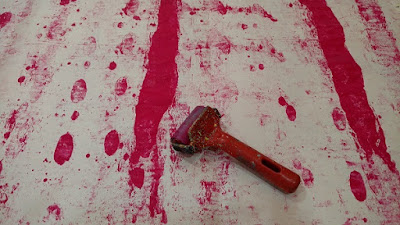
I used a large piece of packing paper or newsprint paper then I squirted paint on the paper and rolled over it with a brayer.

Keep repeating, adding paint and rolling over it with the braye,r turning your paper a quarter turn in any direction after each color. This adds interest and moves the paint in different directions. Keep adding color until you are happy with it.

When the paint layers are dry you can use stamps you’ve made yourself or store-bought. Here I’ve used both. You can also add shapes of your liking using a variety of things you may already have on hand. Like tops from glue sticks, a round washi tape container, a glass, and an empty toilet paper roll. The pink-looking circles in the above photo are made from a used lamp part that was no longer needed.

Once the paper is dry, turn it over and glue your cards face down onto the paper. I like to use playing cards because they are the right size and can be found at dollar stores

Use your brayer to go over the cards as you glue them down to secure a good bond. I used Liquitex Matte Gel. I would not recommend Mod Podge, it’s great for some things, but in this application, not so good. When you mail your cards, they will get stuck once heated up from being in the mail. This can create a less-than-nice-looking card for the person receiving it and is possibly unusable.
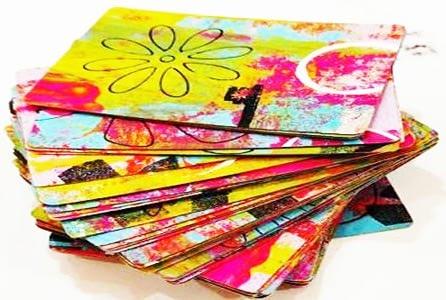
Once your cards have dried overnight, cut them out. Now you are ready to art up your stack of yumminess however you like!
Don’t forget to add info about your ATC to the back. Check out what I created and use for mine. I hope you’ve found this useful in some way.